2018 - Volume #42, Issue #5, Page #27
[ Sample Stories From This Issue | List of All Stories In This Issue | Print this story
| Read this issue]
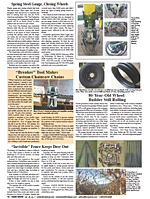
He Plants Sweet Corn Check Row Style
 |

His wife recently sent photos of him standing in a 1-acre check row field that he planted to sweet corn last spring, using a pouch and an Easy Plant stand and plant planter to plant a few seeds at a time into hills.
Check-rowing was a method of planting where each hill of 2, 3 or 4 seeds was exactly the same distance from adjoining hills. A field of check-row-planted corn had the appearance of a checkerboard, with a hill of corn stalks at the exact intersection of each line. That made it possible to cultivate the rows in 2 directions and made it much easier to keep fields weed-free.
However, check-row planting was a highly labor-intensive technique.
With the advent of chemical weed control, check-rowed corn fell out of favor and is rarely seen today.
Im trying to break into market gardening and liked the idea of check-row planting because it lets me cultivate in both directions with my walk-behind BCS rototiller, says the Husum, Wash. resident. I had been using a 1-row Earthway pull-type planter to plant sweet corn in narrow rows. It planted super fast and worked great. The problem was that I had to remove all the weeds in the field by hand, which took too much time. The rototiller was too wide to fit between the rows so I used a wheel hoe, and after that I hand picked weeds within the rows. I could barely keep up and spent most of my summer weeding.
With check row-style planting I can use my walk-behind rototiller in both directions to control weeds, which works 10 times faster than weeding by hand. The only drawback is that setting up the field and planting this way takes a lot of time and labor.
He used the two 300-ft. tape measures to lay out the field in 36-in. rows. The field has fence lines bordering the north and west sides. He stretched one tape measure to its full length alongside the fence line and pulled it tight. He then marked the fence line every 3 ft. Then he went to the other end of the field where there wasnt a fence, stretched out the second tape measure, and inserted stakes with small orange flags on them into the ground every 3 ft.
He then used the Easy Plant stand and plant planter to plant the row, walking alongside the tape measure laying on the ground and planting a handful of seed into a hill every 3 ft. After he finished planting one row, he unclipped the tape measure from the fence line and moved it over 3 ft., then clipped it back on and planted the next row. Every time I moved the tape over I clipped it to the marks I had already made on the fence, says Horn.
The BCS rototiller is 36 in. wide, so I removed 2 tines to provide 3 in. of clearance on either side of the machine. I made 2 passes with the cultivator in both directions until the corn got too tall to cultivate.
Horn planted different sections of the field 2 weeks apart, which resulted in a continual harvest for selling at farmers markets. The field had previously been in pasture and needed nitrogen, so I used an irrigation sprinkler to make several foliar applications during the growing season, he notes.
Contact: FARM SHOW Followup, Daryl and Sally Horn, P.O. Box 159, 40 Fordyce Rd., Husum, Wash. 98623 (ph 509 281-0624; fordycefarm@gorge.net).
Click here to download page story appeared in.
Click here to read entire issue
To read the rest of this story, download this issue below or click here to register with your account number.